Blog Banner

Teff Chocolate Cake

You will love this teff chocolate cake! It’s fudgy and rich and chocolatey and just the right sweetness, but also healthy! You won’t mind giving yourself a second slice. Sweet potato, teff flour, maple syrup, eggs; the ingredient list is full of whole foods. It’s also gluten-free and dairy-free.


Purple wildflower heaven


Ever since becoming a mother alone time is rare and sacred. My days feel constantly full to the brim with work, my daughter Sophia, and cooking and straightening. I have to actively make the time to do something on my own or with a friend. 


Every winter in Israel, wildflowers begin to pop up all throughout the country. Rainy weather and cooler temperatures give the earth a chance to show off it’s beauty. Wildflower viewing day trips are a popular activity here, and people will drive and hike far to discover hidden corners of color. The flowers often spread out like a blanket, painting full hills or fields with beautiful hues for the season.


My friend Einav from berryhunting, and I took the afternoon off to go see some flowers together and enjoy a little picnic. Having an afternoon alone with a friend was heaven. Enjoying the afternoon together in a purple carpeted forest was even more heavenly. Now add in a giant moist and rich chocolate cake and you can imagine the smiles on our faces. 


When I do remember to take care of myself in this way, the benefits are immediate. I feel calmer, more rested, and have more patience for my daughter. It helps me remember that I’m a person with hobbies, dreams, and friends of my own, and not just a mother. 


Teff Chocolate Cake


One of the solo activities that I try and make time for is baking. It can be great with kids as well, but then you know you’ll be cleaning up puffs of flour, chocolatey hands, and an egg or two off the floor. Baking on my own has a whole different feeling; quietness, concentration, experimentation. 


This sweet potato and teff chocolate cake is a new recipe that I’m really enthusiastic to share. Teff flour is the staple flour used in Ethiopia. It’s gluten free and full of calcium, protein, fiber, and vitamin C. I was pleasantly surprised how the chocolate harmoniously masks the taste of the teff and how the flour creates a light and moist texture. I recently began trying out different sweet potato with chocolate recipes and loved the slight earthy taste and sweet and gooey chocolatey texture that was formed.


Another bonus of this recipe is how simple and quick it is to prepare. Besides boiling and mashing the sweet potato, everything else is just mixed together and bakes within half an hour. The cake is delicious served warm, reminiscent of a chocolate fondant. It’s also great at room temperature. Mix coconut cream with dark chocolate and maple syrup and pour on top for the final touch.


Teff Chocolate Cake


Moist, fudgy, and rich, this teff and sweet potato chocolate cake is so healthy. We love how simple it is to prepare. Decadent yet nutritious, it's great for the whole family.


INGREDIENTS


The Cake

  • 1 cup teff flour
  • 1/2 cup cacao
  • 1 ½ teaspoons baking powder
  • 1/4 teaspoon salt
  • 1 cup sweet potato about 1 large sweet potato
  • 1/2 cup grapeseed or canola oil
  • 1/2 cup maple syrup
  • 3 beaten eggs

The Frosting

  • 1/2 cup dark chocolate chips or chopped small
  • 1/2 cup coconut cream
  • 1 tablespoon maple syrup
  • 1 pinch of sea salt


INSTRUCTIONS


The Cake

  1. Peel and chop a large sweet potato into large chunks and boil until soft.
  2. Once soft, blend in the food processor until smooth. it can also be mashed, but the smoother the texture the less it will be noticable in the finished cake.
  3. Preheat the oven to 180 C/350 F
  4. In a large bowl whisk together the teff flour, cacao, baking powder and salt.
  5. In a medium sized bowl whisk together the blended sweet potato, oil, maple syrup, and eggs.
  6. Pour the wet ingredients into the dry ingredients and whisk together until well combined.
  7. Oil a 22 cm square baking dish and bake for about 20-25 minutes, until the middle is just firm.

The Frosting

  1. Heat the coconut cream in a small pot. Once it begins to simmer remove from heat and stir in the chocolate, mixing until it is completely melted.
  2. Then add in the maple syrup and sea salt.
  3. Pour on top of the chocolate cake
  4. Let the cake slightly cool and enjoy while still warm or at room temperature.

NOTES

This cake can be left out for about a day and is great eaten at room temperature. After that please refrigerate and heat up slightly before eating. It can also be frozen and reheated.

— Talya Aji Demri
27 February 2024
More Recipes
הכנה רכה לפרינאום
הרבה דובר על הפרינאום, הכנתו לקראת הלידה, עיסוי, הגמשה, מפגש ועוד ועוד אנחנו רוצות לחזור ולהזכיר שהגוף חכם, וגם הלב, וכמו כל אחת מאיתנו, כל אזור וחלקה שבנו, תבקש קודם תשומת לב, ואחרכך ציפיות ודרישות. אז הינה אחת מהדרכים לתת תשומת לב וריכוך לאזור העדין והקדוש של הפרינאום: סאונת אדים לפרינאום לקראת הלידה *מבשלת בסיר עלים של רוזמרין (בכמות מכובדת, רק עלים ללא גבעול) אפשר להוסיף כמה טיפות או פרחים של לבנדר, קלנדולה וגם מקל קינמון מכינה חליטה מרוכזת, *מוסיפה לה מים רותחים, 2-3 ליטר -תשתמשי בסיר שמתאים לתוך האסלה (או בשרפרף מותאם לאדים וגינלים), *עשי לך אווירה נוחה, קחי לצידך כוס מים, הדליקי לך נר, מבער עם ריח שנעים לך, אולי מוזיקה ברקע או הרפיה…  *שבי לך בנחת, עם מגבת שמכסה את הרגליים לשמור על החום… שיהיה לך נעים, מרפה ומרפא אפשר לשבת 10 דקות ותוך כדי לעשות הרפיה  מתאים משבוע 37 את יכולה לחזור על הטקס המרפה והמופלא הזה כמה פעמים - עד הלידה יתכן שהמפגש הזה יהיה מרגש, עוצמתי, ועמוק, יתכן ויעלו קולות נוספים- ממליצה תמיד לשאל, להתייעץ, ולא להישאר לבד עם כל מה שעולה  מתי לא לעשות? מתי שיש דלקות חוזרות בשתן, פטריה בנרתיק או נשים שסובלות מטחורים או לחץ דם גבוה על הכותבת, מיקה קובל קופפרמן, דולה, מדריכת הכנה ללידה בשיטת היפנוברת'ינג, מטפלת EFT מוסמכת, מלווה נשים בצמתי החיים בהיון ובלידה
— מיקה קובל
מאמאקוקיס- עוגיות שיעשו רק טוב להריון ולהנקה שלך
הגוף הוא כלי העבודה שלנו בעת ההריון, הלידה וההנקה. ככל שהגוף במצב טוב יותר מלכתחילה ומקבל טיפול טוב יותר במהלך ההריון וההנקה, כל תפקודיו קורים בקלות יחסית ובמאמץ מינימלי. תזונה היא הדלק של הגוף, ומכאן חשיבותה הרבה בעת ההריון וההנקה. בתקופה זו של חייך את אכן אוכלת בשביל שניים, שהרי גופך מטפח ומזין גוף נוסף לכל אורך זמן זה. אך התייחסות למשפט הידוע "את אוכלת בשביל שניים" תהיה מדויקת יותר אם ניתן למשפט זה פירוש הנוגע לאיכות המזון שלנו ולאו דווקא לכמותו.   איך ולמה עובדות העוגיות: בעוגיות יש כמות גדולה של סיבים תזונתיים, חלבונים, מינרלים כגון: סידן, מגנזיום, אשלגן, אבץ וסלניום, החיוניים כל כך לתפקוד הגופני שלנו. זרעי צ'יה - עשירים מאוד באומגה 3, עשירים בחלבון, סיבים תזונתיים וחומצות שומן מסוג ALA המשפרות מאוד העברת חומרים מזינים לכלל מערכות הגוף. הם יעילים מאוד בשיפור פעולת הלב, ניקוי רעלים ושיפור פעולת המעיים. בנוסף העוגיות מכילות פיטו-אסטרוגן- המייצר מאזן הורמונלי בגוף. אומגה 3, ביצים וזרעי פשתן הוכחו כמעודדים ייצור של חלב אם, כמו גם שמרי הבירה שהם בעלי רמת פרוטאין (חלבון) גבוהה. החומרים: 200 גרם חמאה 3/4 כוס סוכר 3/4 כוס סוכר חום 4 כפות מים 2 כפות זרעי פשתן טחונים 2 ביצים גדולות כפית וניל 2.25 כוסות קמח 1 כפית אבקת סודה 1 כפית מלח 3 כפות שיבולת שועל 1 כוס שוקולד צ'יפס 2 כפות גדושות  שמרי בירה אופן ההכנה: (1) לחמם תנור לחום 180 (2) לערבב זרעי פשתן טחונים, זרעי צ'יה ומים ולהניח בצד ל 3-5 דקות (3) להקציף יחד חמאה וסוכר, להוסיף את הביצים (4) לערבב את תערובת זרעי הפשתן עם הווניל, להוסיף לתערובת החמאה ולערבב (5) לנפות יחד את החומרים היבשים פרט לשיבולת שועל והשוקולד צ'יפס, ולהוסיף לתערובת החמאה, להוסיף את שיבולת השועל ביחד עם השוקולד צ'יפס (6) ליצור עיגולים על התבנית מהתערובת, ולהשאיר רווח גדול ביניהם כיון שהעוגיות מתרחבות (7) לאפות כ 8-12 דקות עד השחמה. שוקולד עלול לעודד קוליק במקרים נדירים ולכן יש לטעום מהעוגיות ולראות אם הן משפיעות. אפשר להחליף במשמשים מיובשים, בננה מעוכה, שקדים, אגוזי מלך, קשיו, קוקוס וכדומה.
— sharon peled
חליטה מחזקת לחודשי הריון ולאחר לידה
הגוף הנשי עובד קשה מאוד במהלך ההריון, הלידה וכל תקופת ההנקה, ובמיוחד שלושת החודשים הראשונים אחרי הלידה. על מנת לעזור לגוף שלנו לחדש מאגרים חשובים, חשוב להפנים הרגלי תזונה נכונים. דרך אגב שמתן לב שחוש הטעם שלכן השתנה? יש מאכלים או משקאות שהיו אהובים עליכן, ועכשיו...איכס!!! יש מאכלים או משקאות שלא העלתן על דעתכן להכניס לגופכן ועכשיו זה ברמת הקרייבינג??? כלומר הגוף שלכן בעצמו מכוון אתכן, וההקשבה לו היא חלק מהתהליך שאתן עוברות כהכנה ללידה ולהורות שאחריה. חליטת הצמחים הבאה מחזקת את הגוף במשך ההריון, הלידה והתקופה שלאחר הלידה. החליטה באדיבות קרול ג'אוצי, מיילדת סרפד: מלא בויטמינים ומינרלים, חומרים פעילים ונוגדי חמצון. כמות נכבדה של ברזל, משתן (משחרר נוזלים ומקל על בצקות), משפר ספיגה לקויה ועוד. אלפאפא/אספסת: עשירה בויטמיני A,C,B, E, K, ומכילה 8 חומצות אמינו וחלבון. כל אלה הופכים אותה לאידיאלית לחיזוק הגוף, איזון רמות כולסטרול, איזון הורמונלי נשי ושיפור קרישיות הדם. עלי פטל אדום: עשירים בויטמיני C ו B, ומינרלים כמו סידן, מגנזיום, וברזל. עלי פטל אדום שימשו לאורך ההיסטוריה לחיזוק הרחם לכל אורך ההריון ולאחר הלידה בעקבות האמונה כי הוא מייצב את הרחם. שיבולת שועל: עשירה בחלבון, בויטמיני B, סידן, חומצה פולית,  ברזל, אבץ ועוד. מסייעת בשמירה על רמות סוכר מאוזנות, הרגעת מערכת העצבים הימנעות ממצבי לחץ וסטרס. עוזרת לתפקוד תקין של מערכת העיכול והימנעות מעצירויות, שיפור איכות השינה ומגבירה יצור חלב אצל אמהות מניקות. כאשר אנו מכניסות מרכיבים חדשים לתזונה שלנו תמיד כדאי להתחיל בכמויות קטנות תוך שימת לב לתגובות אלרגיות. אם את חווה תגובה שונה כלשהי הוציאי את המרכיב שגורם לכך מהחליטה. הוראות הכנה: הביאי לרתיחה 1 ליטר מים ושימי בכלי מתאים לחליטה. שימי חופן של תרכובת העלים בתוך הכלי וערבבי. כסי  את הצנצנת והניחי לה לעמוד במשך הלילה. בבוקר סנני את המים מהעלים. שתי את החליטה במשך כל היום (אפשר להוסיף עשבים נוספים,להמתיק עם דבש או סילאן או להוסיף שקית חליטת צמחים נוספת) או הכיני לבד: הזמנת החליטה מתכון החליטה הוא מאת קרול גאוצ'י, מיילדת בית אמריקאית: חומרים: כמות על י הפטל והסרפד צריכה להיות כפולה משאר המצרכים. לכמות גדולה השתמשו בכוס מידה, לקטנה יותר, בכף. 1 סרפד Alfalfa leaf 1/2 אספסת 1 עלי פטל אדום 1/2 שבולת שועל  הוראות הכנה- אותן הוראות הכתובות למעלה. מומלץ להתחיל בכוס אחת ביום הראשון על מנת לראות אם אין רגישות. אם אין תגובה שלילית כדי לעלות בהדרגה לשלוש כוסות ביום. רגישויות: נשים בעלות רגישות לגלוטן- יתכן שתהיה להן רגישות לשיבולת שועל. נשים בעלות רגישות לדשא – יתכן שתהיה להן רגישות לאספסת. הזמיני החליטה
— sharon peled
Almond Shortbread Cookies
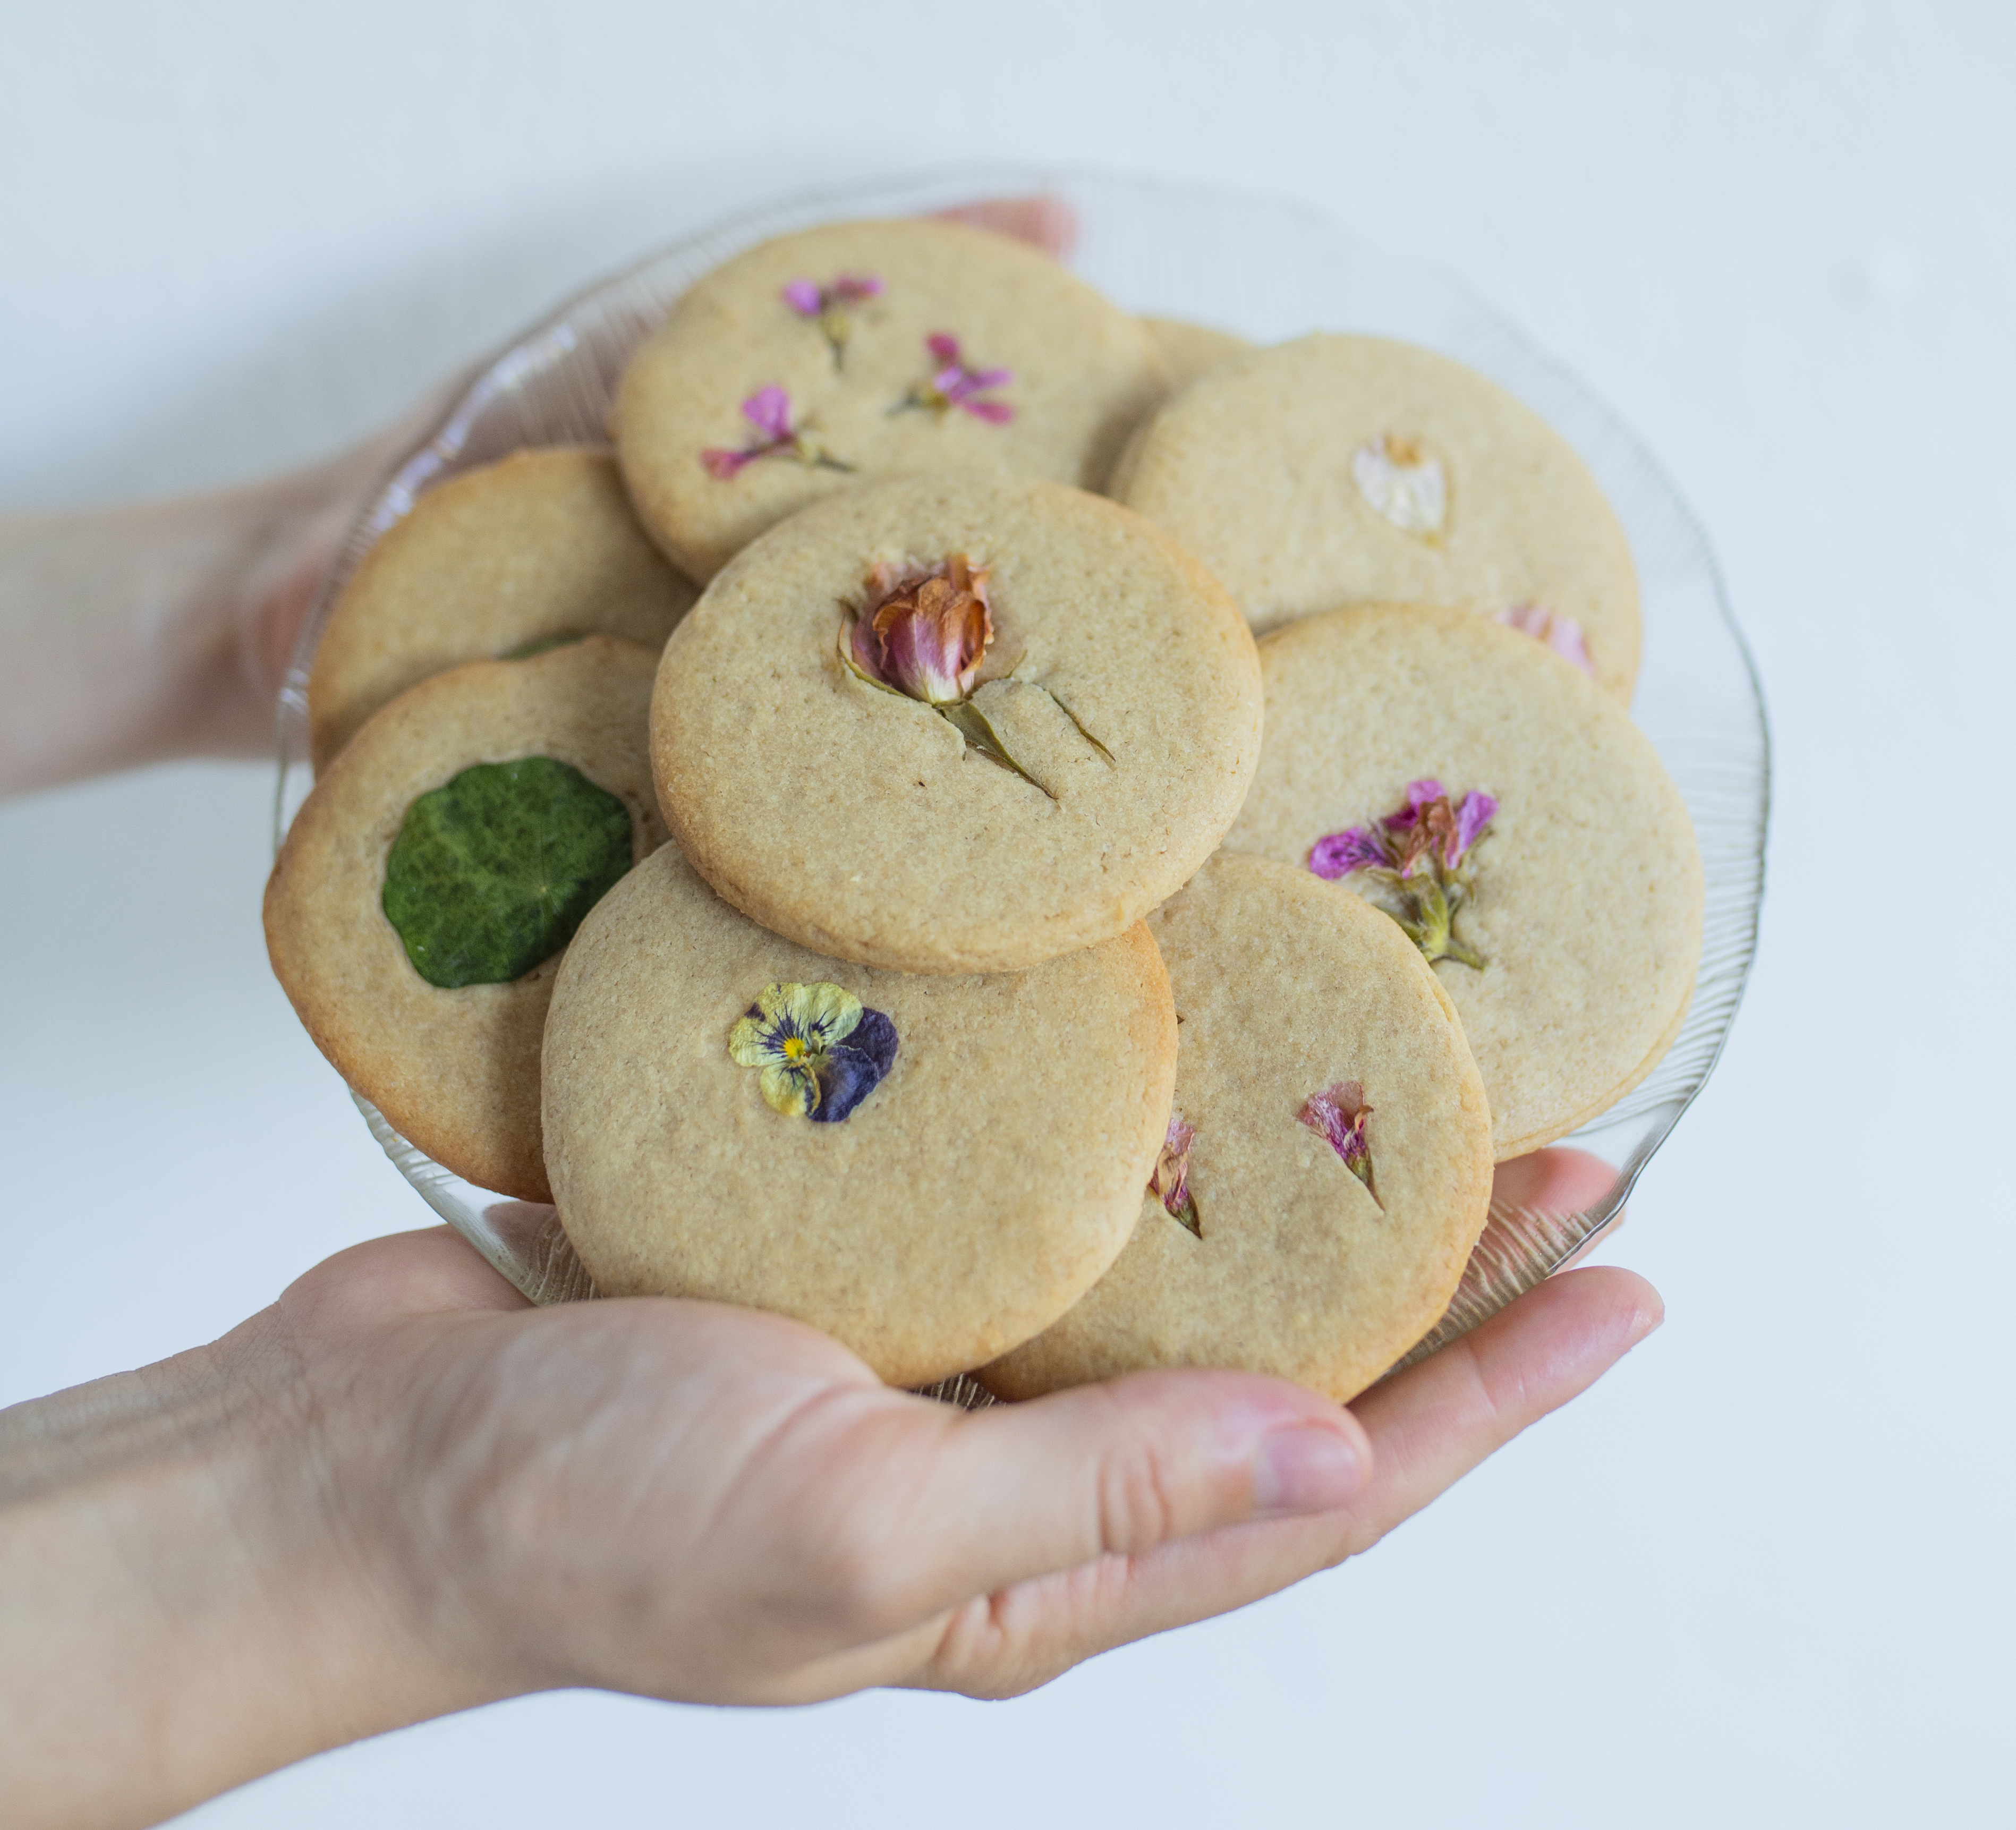
These healthy almond shortbread cookies are quick and easy to prepare. They’re soft and chewy and filled with maple syrup and butter flavor. They’re made with 100% almond flour adding numerous health benefits and a depth to the taste. This is one of my favorite recipes to make for my family and the best part is you won’t even feel guilty after swiping a couple of them hot off the tray. If you’re pregnant make sure to check with your doctor which flowers are healthy for pregnancy; and of course they are just as delicious made without flowers. cookies and rockets The past two weeks have been a strange mix between cookies and rockets, war and baking, pregnancy and riots. I’m 9 months pregnant, waiting for the birth any day. The dissonance between what’s been going on in Israel and what I’ve been trying to focus on is greater than ever. Just as I began my maternity leave and the end of my pregnancy a war broke out. I had plans of spending the past two weeks resting and focusing on the upcoming birth. I had hoped to spend the mornings while my daughter Sophia was at kindergarten meditating, cooking, and finishing up some loose ends for work and the coming baby. Instead I spent the first few days in shock. I felt unable to function, the atmosphere was similar to the mood during the first coronavirus lockdown. A feeling of waiting, waiting for information and for something to happen. Luckily we have a safe bomb proof room in our apartment, it’s actually more like a big closet, but still it’s been reassuring being able to stay in the house when the rocket alarm goes off. Sophia and I curled up on a mattress on the closet floor for the first few nights. You can imagine how that felt with a giant pregnant belly.  shavuot After the initial shock, I’ve been trying to focus on normal day to day things that ground me and help keep me relaxed. Focusing on the pregnancy and preparing for the birth through yoga and meditation has helped. Also the extra family time (my daughter’s at home because of the war) can be difficult but also a pleasure. Last week was the Jewish holiday of Shavuot. Shavuot celebrates the receiving of the Torah and the beginning of the wheat harvest. Culturally it’s also a celebration of the bounty that Israel has to offer- fruit, vegetables, flowers, dairy etc.  For a couple of days leading up to the holiday it felt good to try and immerse myself in preparation. Something about preparing cookies with flowers, our challah bread braided like stars, stuffed grape leaves rolled around the table, the activity helped clear our worried minds. These cookies were especially fun to prepare with Sophia. She loved cutting the dough with cookie cutters and putting an edible flower on each circle.  almond shortbread The recipe is super simple to prepare, healthy, and delicious. The cookies are made using 100% almond flour, butter, maple syrup, vanilla, and salt. Surprisingly the dough rolls out easily and they hold their shape beautifully. I love them best straight out of the oven, when they’re still soft and warm and chewy. They taste really similar to shortbread cookies from my childhood. If adding flowers, edible pansies or rose petals are great choices. Make sure that the flowers aren’t sprayed before using them and if pregnant check with your doctor about which flowers are ok or top with whole almonds.   Almond Shortbread Cookies Soft, chewy, and filled with delicate almond, butter, and vanilla flavors, these gluten free cookies are easy to prepare. If you're like us, you'll find yourself turning to them when you're craving a sweet that you can prepare quickly. You won't even feel guilty after eating a couple of them hot off the tray. If you have edible flowers such as roses or pansies available, they look especially beautiful on top, but whole almonds can be a beautiful alternative. If pregnant make sure to check with your doctor before consuming flowers. INGREDIENTS    2 cups almond flour 1 teaspoon baking powder 1/8 teaspoon salt 1/3 cup maple syrup 60 grams melted butter 1 teaspoon vanilla INSTRUCTIONS   Preheat the oven to 150 C Whisk together the almond flour, baking powder, and salt. Add in the maple syrup, butter, and vanilla and mix to form a wet dough. Put your ball of dough on a sheet of baking paper. Slightly wet your rolling pin so that the dough doesn't stick to it and roll out the dough until it's about 1/2 cm thick. Use cookie cutters to cut out circles or the shapes of your choice. Keep slightly wetting the rolling pin or cookie cutters if needed. Bake for 8-10 minutes until the bottom and the edges of the cookies are golden. Best eaten fresh but can be stored in an airtight container after cooling completely. thanks to berryhunting for the pictures
— Talya Aji Demriטליה אג׳י דמרי
Almond and Pumpkinseed Granola
Isn’t granola the perfect simple meal? I love having it on hand for a quick snack. This almond and pumpkin seed granola is plant-based and gluten-free and made using 100% maple syrup. You can play with the nuts, seeds, and dried fruit to find your own favorite combination. Make sure to check out my tips on creating oat clusters. Simple, Quick, and Filling Granola is the perfect breakfast and snack to have on hand. It’s healthier than store bought cereal and much cheaper than purchasing stocks of natural granola. For pregnant and breastfeeding mamas who need a quantity of easy and healthy meals handy it is just the thing. It keeps well for a while and you can make a big quantity and have it as a backup meal.  It is a great way to make sure you fit protein, omega 3, and fiber into your snacks. Oats and almonds are also known to boost milk supply and can be beneficial when breastfeeding. Granola keeps well outdoors; and if you add nuts and fruit gives great energy for a day outside of the house. If you have a cooler you can enjoy it with yogurt, if not then it’s great with almond milk as well.  This granola is unique. Following a trick I learned on America’s Test Kitchen long ago, it isn’t mixed at all during baking. Instead, the granola is firmly pressed down into the baking sheet and baked for 40 minutes at a low temperature. It’s left to cool, and then broken into clumps. I love using a mix of rolled oats and instant oats to help form the best clusters. The recipe is very versatile in relation to the types of nuts, seeds, and dried fruit you can add. If you want to really have fun with it feel free to add some chocolate chips or cubes of halva. I’ve tried all different varieties, and here is one of my favorites. Just make sure to add the raisins after baking and not in the oven, so they don’t get hard. The sweeteners and type of oil can be played with as well. I’ve found that using 100% maple syrup adds a wonderful flavor and forms nice clusters. I like using silan (date syrup) sometimes as well, but it can be a bit heavy, so it’s nicer to use part silan and part honey, sugar, or maple syrup. Coconut oil, grapeseed, canola, rice bran, or even butter will all work nicely. Coconut oil leaves a slight coconut taste.  Almond and Pumpkin Seed Granola You'll love these perfect clusters of oats, nuts, and seeds. This granola is vegan and gluten free and made with 100% maple syrup. It's the perfect quick and healthy snack or breakfast to have on hand. INGREDIENTS    4 cups rolled oats 4 cups instant oats 1/2 cup sliced almonds 1/2 cup pumpkin seeds 1/3 cup sesame seeds 1/3 cup coconut 1 cup oil grapeseed, coconut, canola, etc 1 cup maple syrup 2 teaspoons vanilla extract 1/2 teaspoon cinnamon a pinch of salt 1/2 cup-1 cup of dried fruit (optional) raisins, dried cherries, etc. INSTRUCTIONS   Preheat the oven to 160 C/ 320 F (top and bottom without convection) Line a large baking tray with baking paper. In a large bowl mix together the rolled oats, instant oats, almonds, pumpkin seeds, sesame seeds, and coconut. In a separate smaller bowl whisk together the oil, maple syrup, vanilla, cinnamon, and salt until well combined. Pour the wet mixture on top of the oats and nuts and mix well until all of the oats and nuts are coated. Pour onto the baking paper lined baking tray. Smooth and even out the granola mixture and then firmly pat it down with a spatula. Bake for 30-40 minutes until golden but not burnt. If needed flip the baking tray midway. Do not mix at all while baking. Remove the granola from the oven and let cool for at least 20 minutes. It will cool and harden. Gently lift the edges of the baking paper in order to break the sheet of granola into chunks. Try not to dig into it with a spoon but use the baking paper and your hands to gently break the sheet up. Mix in your dried fruit. Once the granola is completely cool then store it in an airtight container. Will last at least a week if not more. NOTES Notice that this recipe is quite versatile. Feel free to add your own favorite nuts, seeds, and dried fruit. Maple syrup can also be replaced with other sweeteners such as sugar, honey, or silan. If using silan then we like to use 3/4 cup of silan and 3 tablespoons of a different sweetener. If using silan make sure to check the granola earlier as it can burn more easily.  Thank you berryhunting for the beautiful picture.
— Talya Aji
Upcoming Childbirth Classes